Showing posts with label watercolor. Show all posts

Sunday, October 31, 2021

"Storm Moving In" (watercolor on paper; 9" x 12")

"Storm Moving In" (watercolor, 9" x 12)
 

I decided to blog about my online Zoom classes with the Art League School in Alexandria, VA. This is what we did in the sixth week of the fall term, 2021 for my "Watercolor from Start to Finish" class.

The first business this week was finish "Holmes Run Rocks". First, we painted the first layer of the rocks and pebbles with the mixture of quinacridone gold and a little bit of purple (cobalt blue and crimson). Make sure you paint around the sun-struck highlights (if you lose the white of the paper, you lose the game!). If necessary, draw the pebble shapes first, then paint around them.

We started the second stage with the big tree shape using the dotty pointillist method of applying paints. I used three tones: the light tone green (Winsor lemon and cobalt blue), the mid-tone green (cadmium yellow pale and ultramarine blue), and the dark tone (ultramarine blue and permanent alizarine crimson). The tree trunks and branches were painted with the mixture of ultramarine blue and burnt sienna (this is called Jane's Gray).

Then, we moved on to the rocks and pebbles with the dark shadow tone of cobalt blue/ultramarine blue and crimson. We have already established the mid-tone in the first stage. You will see the rocks and pebbles suddenly emerging before your eyes!

The final touch that brought the painting together was the glazing of the big water shape. We wetted the shape first, then dropped the mid-tone mixture of gold and burnt sienna. Quickly we painted in the reflected shadows of the trees and the submerged pebbles with the purple mixture of ultramarine blue and crimson. If your paper is too wet, whatever you put down will fuzz into the water!

"Holmes Run Rocks Demo" (watercolor, 12" x 9")

As you can see my demo painting above looks a little different from my sample painting below. Which one do you like better?

"Holmes Run Rocks" (watercolor, 12" x 9")

The main business of this week was painting a triptych, "Storm Moving In". The first image below is the reference photo I took on Assateague Island. Instead of painting from it as is, I cut it up into three unequal pieces, moved them around until I found a pleasing design, which is the second image. Basically, I placed the tall left panel in the right side and put the two divided right panel pieces in the left for the heck of it!

Anything that moves (in this case, a seagull in flight) becomes the center of interest, which happens to fall in the sweet spot of the picture (one quarter way down from the top and one quarter way in from the left edge; there are four potential sweet spots in a picture, by the way). The tall right panel is now the anchor; the two smaller panels on the left are not of the equal size.

"Storm Moving In Original Reference"

"Storm Moving In Reference Reimagined"

Making sure the horizons are straight and at the same level, and at right angle to the side edges of the paper, we drew them with the help of a ruler/straight edge. Then, we divided the picture with a 1/2"-wide washi tape (not so tacky tape) into three small paintings that cohere.

We started the painting with the right long panel. First we wetted the paper and painted the glowing sky shape and the glowing wet sand shape with the pale mixture of Winsor lemon and cadmium red pale. When the paper was dry, we wetted the paper again and dropped the blues in the clouds and the ocean waves with the blue mixture of cobalt blue and burnt sienna. The dark sand shape was painted in the mid-dark tone of ultramarine blue and burnt sienna.

When the first layer (which took two separate steps to avoid contaminating the alternating shapes) was dry, we glazed each shape with a little darker mixtures to create edges and drama. We will pick up from here next week!

"Storm Moving In Demo in Progress" (watercolor, 9" x 12")


Sunday, October 24, 2021

"Holmes Run Creeks" (watercolor on paper; 12" x 9")


"Holmes Run Rocks" 

 
I decided to blog about my online Zoom classes with the Art League School in Alexandria, VA. This is what we did in the fifth week of the fall term, 2021 for my "Watercolor from Start to Finish" class.

We spent about two hours trying to finish up "Red on Red", but didn't manage. Lol. First, I drew a cherry tomato in graphite to explain the local color, highlight, form shadow, reflected light, and cast shadow. It's easy enough, but once we start painting in color, things can go haywire. I painted around the highlight shape with cadmium red; for the form shadow, I switched to permanent alizarin crimson, but switched back to red for the reflected light. If you use enough paint, you won't need to glaze. When the tomato was dry, we painted the cast shadow with the purple mixture of cobalt blue and crimson.

All the cherry tomatoes and red peppers were painted the same way. As a matter of fact, the vase and apple were painted the same way too, although they may have required a glaze or two; the apple has the belly button and stem area that require some fiddling.

As you put down a wet stroke of one color next to the still wet stroke of another color, make sure you remove the excess water from the brush to avoid runbacks. Don't try to be thrifty by using only one or two sheets of paper towel for the entire painting session. The difficulty of watercolor has everything to do with the control of the ratio between water and paint and the sensitivity to the moisture level in the brush and on the paper. (The other difficulty is the one-way-ticket painting process unique to watercolor, meaning we proceed only in one direction: from light to dark. That's why we have to organize and plan ahead.)

Then we painted the green stems and leaves with the green mixture of Winsor lemon and cobalt blue. Let the first layer dry and do the second layer with a darker green on the shadows along the stem and on the leaves to create form. When the second layer is dry, paint the cast shadows with the purple mixture of crimson and cobalt blue.

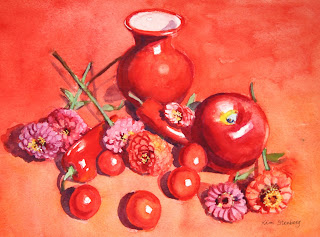
For the zinnias, we first drew the overlapping layers of tiny petals with appropriate colors of watercolor pencils and started the first layer of wash in orange (the mixture of red and cadmium yellow pale), permanent rose, red purple (the mixture of rose and a little cobalt blue), etc. When it was dry, we had to redraw the petals because watercolor pencil lines disappeared, giving us one more opportunity to redraw. For the dark crevices, I used the red purple mixture (crimson and cobalt blue).
 
If you wish, you can have fun with the tiny yellow star-like shapes in the center of some zinnias by painting them with the mixture of yellow and white gouache with a rigger brush. Finish the zinnias by painting dark purple cast shadows. Below are the two demo process images and finished painting. 
 

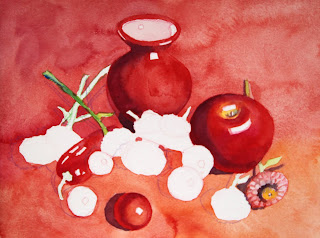
"Red on Red in Progress I"

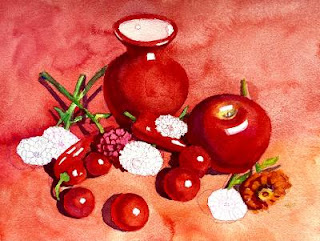
"Red on Red in Progress II"

"Red on Red" (watercolor, 9" x 12")

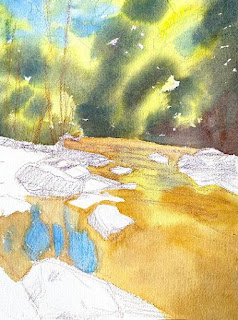
This week's main lesson was painting rocks. I first drew the design with watercolor pencils (green, brown, blue, and violet). The shading in the rocks is demonstration only; don't do it yourself. Landscapes can be overwhelming to many students. Think the big shapes first. In this exercise there are five big shapes: the sky and trees, the middle ground cluster of rocks and pebbles on the left, the foreground big rock and pebbles, the big water shape, and the small group of rocks in the middle ground on the right. Group the shapes and cluster them in a meaningful manner that allows the viewer's eye to enter the painting and travel and linger.

I started painting from the top (that's how we generally paint landscapes) on dry paper, with cobalt blue for the sky holes, yellow green (lemon and a bit of cobalt blue) for the tree foliage in the sun, dark green (quinacridone gold and ultramarine blue) for the dark foliage in the shadow, and dark brown (burnt sienna and ultramarine blue) for the shadowy area in the right bottom of the big tree shape.

For the water, I used gold, yellow green (lemon and a little bit of cobalt blue), and warmer gold/burnt sienna as it gets closer to the bottom of the paper. Please develop "Holmes Run Rocks" up to this point. We will finish the painting together next week and move on to the triptych exercise!


"Holmes Run Rocks in Progress"


Sunday, October 17, 2021

"Red on Red" (watercolor on paper, 9" x 12")


"Red on Red" (watercolor, 9" x 12")

I decided to blog about my online Zoom classes with the Art League School. This is what we did in the fourth week of the fall term, 2021 for my "Watercolor from Start to Finish" class. This week's lesson was the color Red. The first order of the day was to talk about our three reds (cadmium red, permanent rose, and permanent alizarin crimson) in term of their temperature, value and intensity. I also discussed the importance of color lightfastness and asked you to avoid fugitive colors, such as rose madder genuine, alizarin crimson, opera rose, etc. 
 

Then we mixed oranges and purples from our reds, yellows and blues. I explained why I chose certain colors (think the closeness to each other on the color wheel to achieve brighter versions of the secondary colors). The color-mixing ability comes from experience, but if you understand a bit of "color theory", it's much easier and less "let's hope for the best" than otherwise!


Then we moved on to the business of drawing a vase, first cylindrical glass, then a pitcher with a handle and spout. Many students get stumped on this, so I tried to help you how to draw a symmetrical form utilizing the central axis line and turning the paper upside down to turn off the analytical side of our brain. Here is a page from Bert Dodson's Keys to Drawing, a drawing manual that will help you overcome your fear of drawing. It's the best there is and I have done many the exercises more than once!
 

Finally, we got to the painting. First we drew the shapes with watercolor pencils (red for the red shapes and green for the green stems and leaves), making sure that they don't float in the middle of the paper with tiny positive shapes and a huge negative space. And please overlap shapes!

Then we painted the negative space with cadmium red on dry paper. Use enough paint and lots of water so that paints don't dry on you. Near the right bottom of the paper, introduce a bit of cadmium yellow pale; when you get to the left top of the paper, add some alizarin crimson. Use a large round brush; for tiny "trapped shapes", use a smaller brush. Painting around the positive shapes is called negative painting, which is not the easiest thing in the world. Do the best you can and don't worry about perfection.

If your first wash is too anemic, do another layer on dry paper. Mine looked fine, so I moved onto painting shapes, after firming up the contour lines of the shapes and also indicating the highlight shapes on the vase, apple, peppers and tomatoes with watercolor pencils.

Starting with the vase, we painted the shapes with the appropriate reds (think temperature and value). I explained the form shadow, cast shadow and reflected light. We did the second layer on the vase, apple, pepper, and tomato, and also painted cast shadows (after drawing them first with a purple pencil).

Creating a form (making a shape appear three-dimensional) by using colors (with the same hue but of different temperatures and values, then glazing with the shadow colors for the form shadow, and even softening edges) is hard! I will go over this next week again.

We didn't get very far, so decided to stop here and finish the painting next week. Please develop the painting up to this point.

"Red on Red" in progress


Monday, August 19, 2019

"Queen Anne's Lace Country" (watercolor on paper, 12" x 9") sold


sold

While driving along the St Croix River in Minnesota a few years ago, we saw this lovely view of the summer country dotted with delicate and elegant Queen Anne's Lace. My job was to recreate the sensation in watercolor. Do you think I succeeded?


Wednesday, July 17, 2019

"Monet's Giverny Garden in Wisteria Season" (watercolor and gouache; 8" x 8") sold

sold


Wisterias are blooming over the famous Japanese Bridge at the waterlily pond in Monet's Giverny gardens. The fragrance of white and purple wisterias perfumes the air.


Saturday, December 29, 2018

"Erik and Kyla" (watercolor on paper; 8" x 8") gift


gift


Here is the double portrait of Erik and his wife, Kyla, that I painted for her as a Christmas gift, remembering happiness and wishing for healing. Miss you, Erik. 


Friday, December 14, 2018

"Bixby Creek Bridge, Big Sur" (watercolor on paper; 9" x 12") sold


sold

I love Big Sur, California. Ocher and green hills, intense blues of the ocean, colorful wildflowers, the Bixby Creek Bridge, and so on. I visited it this summer, this time under sad circumstances. The coastal paradise was as beautiful as ever.


Tuesday, November 13, 2018

"Howard's Pals" (watercolor, 22" x 30") sold


sold

Recently I received a request for an unusual commission from a client who wanted to present her husband, a hobby DJ, with a portrait painting in watercolor for their 24th wedding anniversary. Nothing unusual about that, but she wanted me to include squirrels, his favorite animal. And a robot from the TV show "Lost in Space", chocolate chip cookies, a Boston University mug, an IPhone, his favorite stuffed animals, David Letterman, Tony Bennett, Ella Fitzgerald, Peggy Lee, and Frank Sinatra in a radio station recording booth. Let's not forget about a few portraits of the couple and his parents somewhere in the room!

It took about a month for me from conceptualization to the finish.  I can't say it's a great piece of art, but it is a whimsical fantasy and there isn't likely to be another piece like this anywhere in the world!


Design drawing

Color study in Copic markers

I started painting section by section from the top left.

Getting there!

Sunday, August 5, 2018

"Watercolor from Start to Finish": I Am Teaching Watercolor at The Art League School!


Week 1: Introduction and Painting Donuts!
"Donut Bliss" (watercolor, 7" x 10")
Click here to buy


My dear friend Alice Kale, who teaches watercolor, has been pestering me to do the same for some time, and I finally surrendered to her persuasion. I took over another teacher's slot at The Art League School in Alexandria, VA. It is a six-week-long intensive introduction to watercolor, called "Watercolor from Start to Finish". An enthusiastic class of 18 has been meeting every Saturday from 9:30 to 12:30 for watercolor fun. At this point, we have just one more class to go. And what fun has it been!. This is indeed the beginning of a new chapter in my art career, as I will continue to teach as a regular staff at The Art League School from now on!

The first week I brought donuts to the class, since I thought their simple shapes and fun associations would encourage the beginners (minus two who are experienced watercolorists) to dive into watercolor without fear. And I was right. Some students ate donuts first and painted them from photos!


Week 2: Fruits and Vegetables
"Carrot Bunch" (watercolor, 9" x 12")

Drawing and painting from life is an invaluable training whether the subject is humble everyday things, or a figure. So carrying on the theme of still life of donuts of the first week, the students were asked to bring some fruits and vegetables of their choice for the second class. Several brought a bagful of produce; I love this class! Shapes got a little more complicated, but we are not so worried about drawing for now. (To those who want to improve their drawing skills, I recommend Bert Dodson's Keys to Drawing.) Instead we are focusing on the importance of values, edges and color temperatures in a painting.


Week 3: Landscapes
"Bixby Creek Bridge, Big Sur" (9" x 12")
sold

Week 4: More Landscapes
"Yaquina Head Lighthouse Sunset" (watercolor and gouache, 9" x 12")
Click here to buy

For the next two weeks, we painted landscapes. I did a demo of gradated/varigated washes and the students were let loose to work with the photos they brought, while getting accustomed to the watercolor terms such as washes, glazes, wet on wet/wet on dry, dry brush, etc. Landscape painting can get overwhelming with so many elements to deal with, so I emphasized that the class should look out for big shapes first. If one breaks down a picture into big shapes, there are usually only three to five. That's not so hard, is it? But landscapes often involve leaf/grass textures; boy, many went astray with them. It's been 23 years since I started painting watercolors and the memories of the excitement and frustrations are all coming back!


Week 5: Animals
"Emperor Penguin Love" (watercolor, 8" x 6")
Click here to buy

Changing gears, we painted animals this week. What fun it was! Several painted their dogs; many others painted colorful birds. It all comes down to this: paint what you know well and hold dear. And it showed. I am definitely keeping the subject of animals as part of my curriculum.


Week 6: Flowers
"Red, White and Blue" (watercolor, 7.5" x 10.5")
Click here to buy


One more week to go. Next week we will be painting flowers. We actually took a vote on this; between flowers, portraits, buildings, flowers won. But I let the class know they can paint whatever they choose for the final week. It's going to be fun and challenging no matter which!


Week 6: My awesome class intently painting flowers

Thursday, May 3, 2018

"Lavender Heaven" (mixed media on paper; 9" x 12") sold


sold

A girl in a white dress and hat is picking flowers in a field of purple, scented lavender clouds. It is a lavender heaven! The painting is of the mixed media of watercolor and lightfast Caran d'Ache Luminance colored pencils. It was difficult to achieve the spiky, yet soft texture of lavenders, so I used colored pencils for them.

Thursday, April 12, 2018

"You Are Nothing But A Pack Of Cards" (watercolor on paper; 11" x 8") sold


sold


Recently I reread Alice's stories and fell in love with her. After checking first the famous black-and-white illustrations by Sir John Tenniel are out of copyright, I decided to render in color some of my favorite illustrations. I drew with a watercolor pencil, then inked my drawing. The colors are my invention.

Alice has had enough with the Queen, who insists on sentence first and verdict afterwards at the trial. Honestly, the book is so full of nonsense that I don't even remember who was being tried on what crime! When the Queen cries "Off with the Head!", Alice responds with "Who cares for you? You're nothing but a pack of cards!" Hurrah for my brave girl!

Wednesday, April 11, 2018

"Down the Rabbit Hole" (watercolor on paper; 12" x 9") sold


sold


Recently I reread Alice's stories and fell in love with her. Somehow there is no original illustration for this famous scene of Alice falling down the rabbit hole that sets her off on her wild adventure. Here is my attempt. She is falling down slowly; she can even look around and think about things. That's why she doesn't look panicky. Doesn't she look graceful?

Thursday, January 18, 2018

"Alice Floating Down the Rabbit Hole" (mixed media on paper; 12" x 9")


click here to buy


Recently I reread Alice's stories and fell in love with her. Alice is a plucky little girl who doesn't get fazed by the bizzare adventures that are thrust upon her. After checking first the famous black-and-white illustrations by Sir John Tenniel are out of copyright, I decided to render some of my favorite illustrations in color.

Alice follows a white rabbit into the rabbit hole. As she slowly floats down, she has time to look around.: "Down, down, down. Would the fall never come to an end? 'I wonder how many miles I've fallen by this time?' she said aloud." This is the event that starts off Alice's strange adventures in Wonderland!

Sunday, January 7, 2018

"White Peony Glory" (oil on stretched canvas; 12" x 12") sold


sold


This painting was forced on me. I didn't want to paint it. I protested that it was impossible. But my client insisted that it should and could be done. So, willy nilly, I transformed a rectangular painting in watercolor into a square one in oil. I rather like the result. How about you?


"White Peony Rhapsody" (watercolor on paper; 7" x 10")

Thursday, November 23, 2017

"Dream Butterfly Garden" (watercolor; 8" x 8") sold


sold


Orange butterflies flit about dainty sprays of white flowers in a dreamy garden.

HAPPY THANKSGIVING! I would like to thank all my readers for your kind support!


Sunday, July 9, 2017

"Indigo Blue Waterlily Pond" (watercolor on Yupo; 8" x 10") sold


sold


A lone white waterlily floats in the indigo blue pond. A watery, dreamy painting that is possible only on Yupo, which is a sleek synthetic paper that repels water. So water puddles and does unexpected things!

Monday, July 3, 2017

"Tree of Life" (watercolor on paper; 8.5" x 8.5") sold


sold

In my small painting, I tried to capture the majesty of the baobab tree at dusk, when there is still lingering daylight even as the stars start dotting the indigo blue evening sky.

The majestic baobab tree is an icon of the African continent. The baobab is a prehistoric species which predates both mankind and the splitting of the continents over 200 million years ago. Native to the African savannah where the climate is extremely dry and arid, it is a symbol of life and positivity in a landscape where little else can thrive. It is a succulent, which means that during the rainy season it absorbs and stores water in its vast trunk, enabling it to produce a nutritious fruit in the dry season when all around is dry and arid. This is how it became known as "The Tree of Life".

Baobab trees grow in 32 African countries. They can live for up to 5,000 years, reach up to 30 metres high and up to an enormous 50 metres in circumference. Baobab trees can provide shelter, food and water for animals and humans, which is why many savannah communities have made their homes near Baobab trees.